
Background:
Seeing a post about this Bar-Tek Motorsport upgrade air duct prompted me to contact Bar-Tek to learn how they determined the improvements they attribute to their product versus the stock GTI air duct.
The benefits of this upgrade duct are claimed to include:
- Reduction of pressure loss
- Minimization of turbulence
- Improved throttle response
- Increases air mass in the intake area
- Delivers more cold air
- Increase in power and torque
- Relief of the axial bearing of the turbocharger
- More homogeneous flow to the turbocharger
- Minimization of stalls and turbulences
Whew! Let me catch my breath a moment.

With all of those benefits received by purchasing and installing the upgrade duct I thought I would reassess the stock air duct with a few DIY modifications to see how they affect the airflow through the intake.
Test Setup:
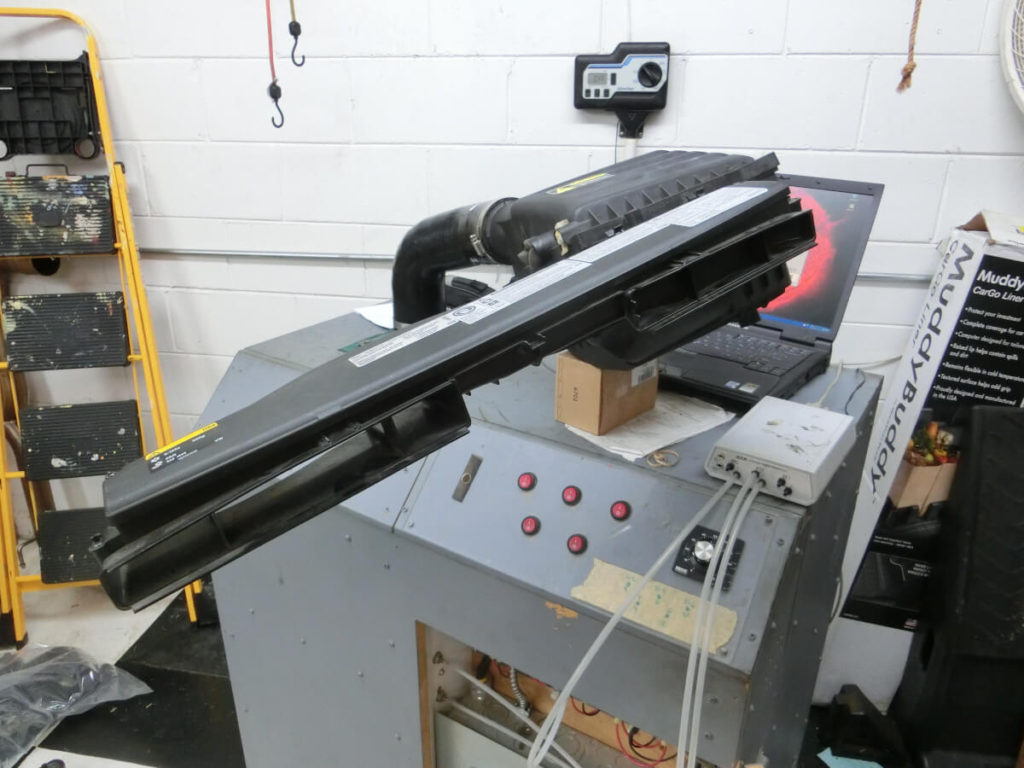
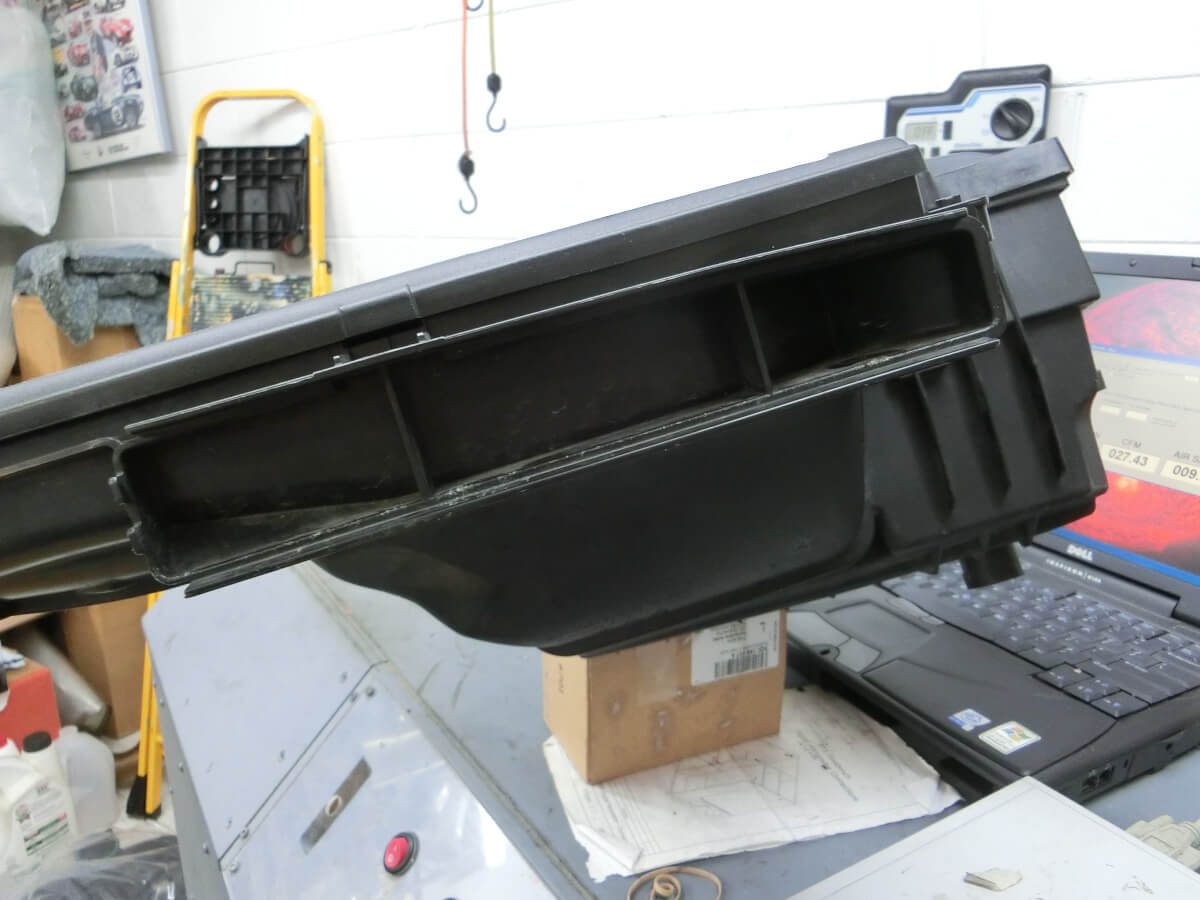
The stock GTI airbox and duct are the main components of this test. The stock airbox has had the “grate” removed from the lower half of the box and the stock air filter is replaced with an aFe Power dry filter.
The airbox is connected to a flow bench using an MST Performance inlet hose and a 3″ adapter.
Before taking measurements with the airbox and duct the flow bench is checked using a calibration plate.

The duct will be tested in three configurations. The first configuration is the stock opening arrangement. The front of the driver side is blocked and the front and rear on the passenger side are open. The second configuration is with the front of the driver side open and the rear of the passenger side closed. The third configuration is with the front driver side open and both the front and rear of the passenger side open.
A baseline measurement will be made without the duct attached to the airbox.

Test Results:
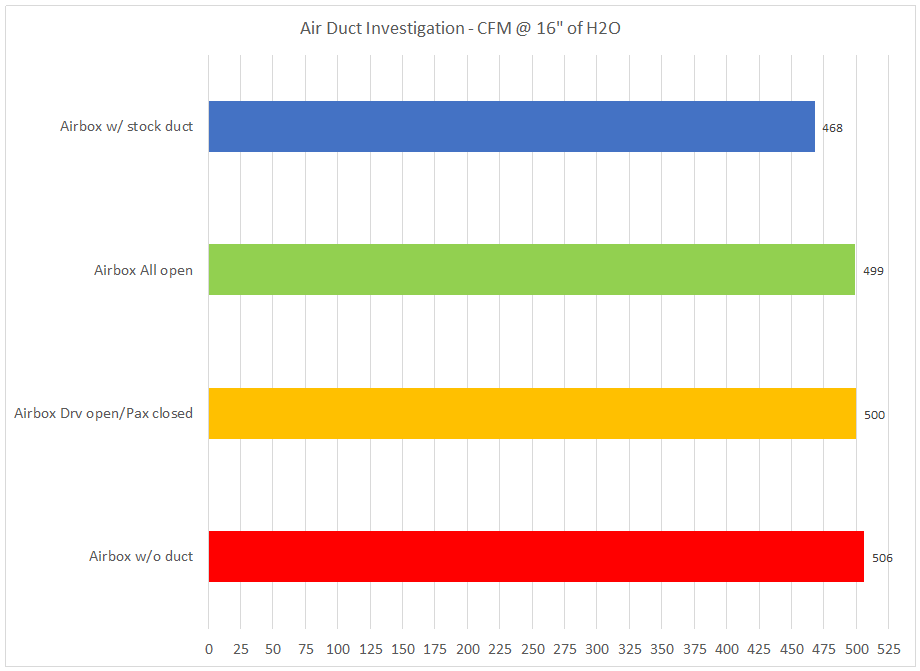
The airbox without any duct attached flows 506 CFM @ 16″ of H2O.
The stock duct is then attached to the airbox.

The stock duct setup flows 468 CFM @ 16″ of H2O.
The modified stock duct with open drivers side and closed rear passenger side is tested next and flows 500 CFM @ 28″ of H2O.

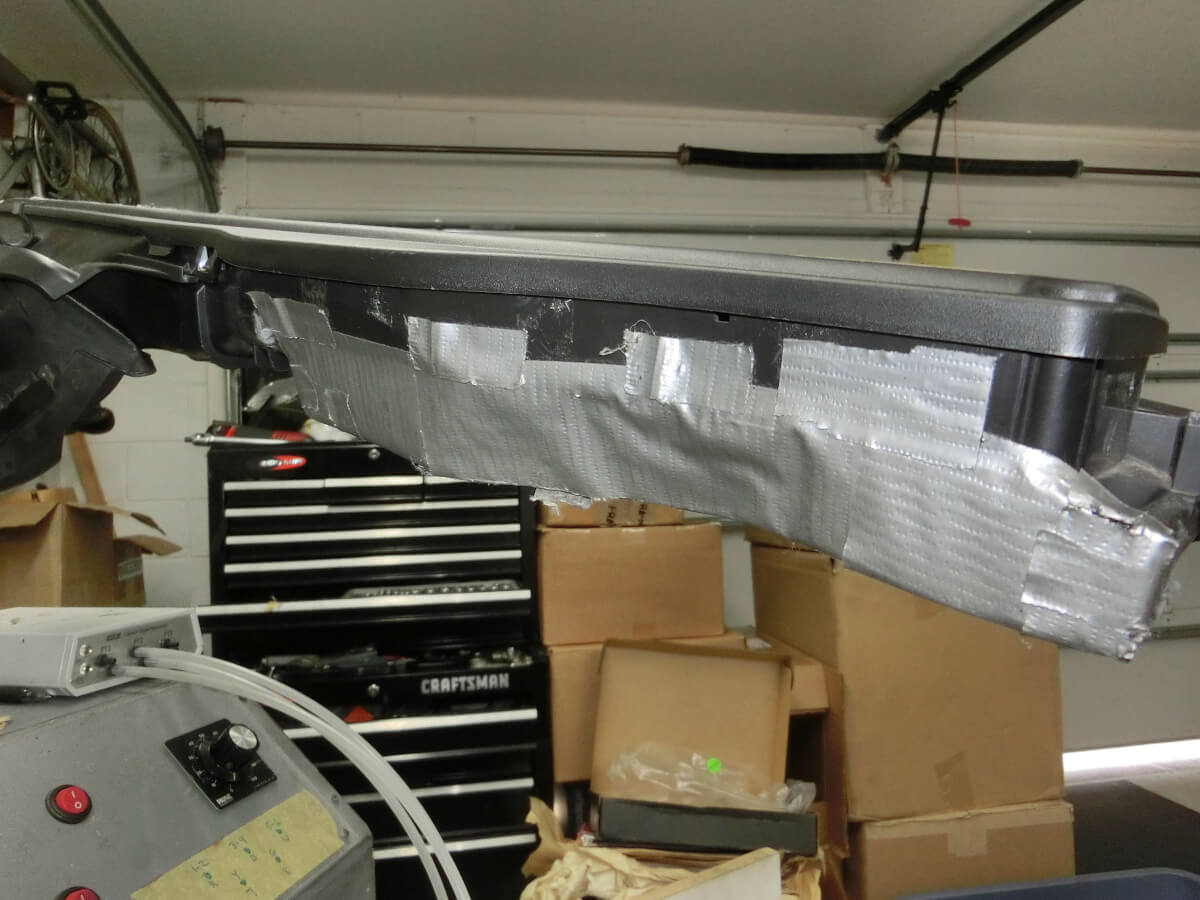
Stock Duct with closed passenger side rear
The next measurement is made with all of the openings clear. The reading is 499 CFM @ 16″ of H2O.

All of the measuremetns are presented in the chart:
Conclusions:
The addition of the stock duct to the stock airbox resulted is a 7.5% decrease in airflow at the test depression.
The DIY modification of opening the driver side front of the duct recovered a majority of the airflow, measured as a 1.2% decrease versus the baseline case.
Note: The baseline case has no duct at all. The duct fits into an opening on the airbox and reduces the cross-sectional area of this opening due to the thickness of the material that the duct is formed from. The small difference in airflow between the baseline configuration and the opened duct could be due entirely to the reduction in the cross section of the opening to the airbox, and not attributed to any other characteristics of the duct.
Opening the rear passenger side produced a similar reading to when the opening was covered, 499 vs 500 CFM. +/- 2 CFM is the measurement margin of error. This result leads to the conclusion that the two frontal openings are sufficient to support the demand from the airbox.
The stock duct can be modified so that it causes little impediment to airflow entering the stock airbox. The difference in airflow, 506 vs 500 CFM, leaves a small 6 CFM margin for improvement.
Hey Jeff!
Love your work, a big fan here.
I already have this mod on my Cupra Ateca, my curiosity is what happens if the passenger side rear is open and the engine is hot (in terms of air temperature). I believe while driving, the air should be pushed inside the engine compartment. Not sure what happens when the engine is in high revs + high speed, maybe it gets some hot air if this is open, or maybe not?!
Thanks,
Paul C.
Hey Paul, thanks for the feedback, I’m glad you have found the information useful!
I’ve tried a couple different experiments with the duct. One during a pull and the other cruising around.
Thank you! Really useful