Background:
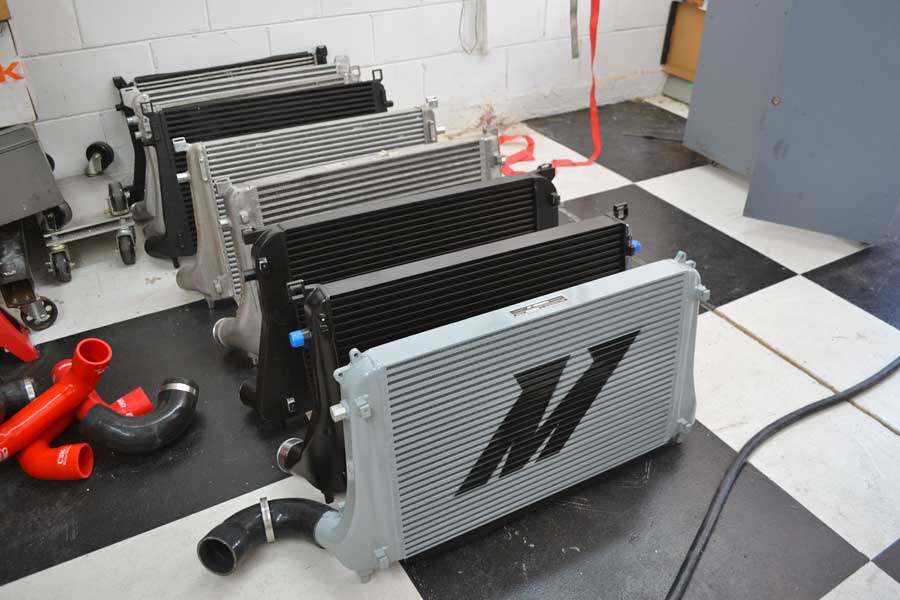
With the do88 and Integrated Engineering intercoolers the top products after running a number of intercoolers through some tests I gave thought to how I would select one of the two.
To a large degree the process of whittling the candidate list down to these two has been an exercise in splitting hairs. Splitting hairs under limited testing conditions no less.
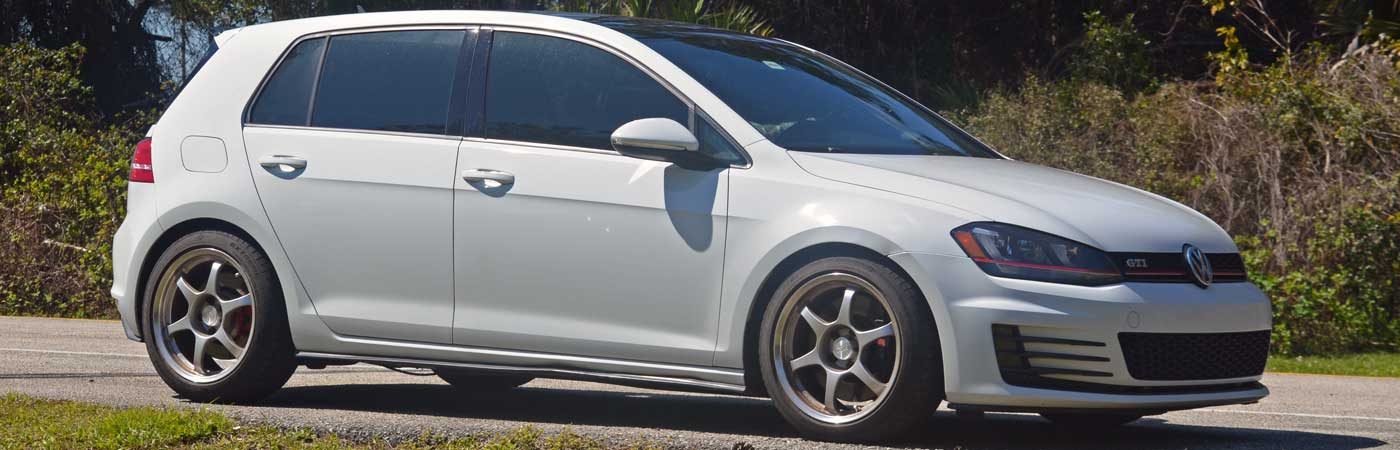
Choosing an intercooler as an upgrade from the GTI stock IC is a trivial matter, pick anything and there is a very good chance it will perform better. Trying to choose between APR, AMS, do88, IE, not such a simple process.
Having the collection of intercoolers on hand highlighted the different design approaches, which begs the question of why.
That’s a question for the manufacturers to answer, but to me a possible reason is that they are designed to perform optimally under different operating conditions. Snow tires versus summer tires, pick the condition you plan to operate and select the best product for it. An intercooler that is optimal for a 12 second pass down a drag strip will not have the same properties as one designed to be operated under load for 20-30 minutes. Undoubtedly there are some decent All Season ICs, and you can use each “specialist” in conditions it’s not built for, snow tires during the summer, but for optimizing performance the goal would be to align the product to the conditions.
Which brings me back to the opening quote. After running through the first series of tests I thought about what could have been done better, and what more can I try to learn during controlled testing. I came across an interesting paper on counterflow heat exchangers (Reference document) and decided to try and assess cooling efficiency of the intercoolers that I still have access to. (With the IE V2 and V1 on hand this became a more pressing goal.)
Bench Cooling Trials Runs
A number of trials were performed using the IE V1 intercooler to try and determine a test method that would efficiently lead to a determination of the heat transfer equilibrium point. Where did the outlet air temperature remain stable with hot air being drawn through the interior of the core while cooling air passed through the exterior fins of the core? Heat going in = heat going out, what outlet temperature did that occur at?
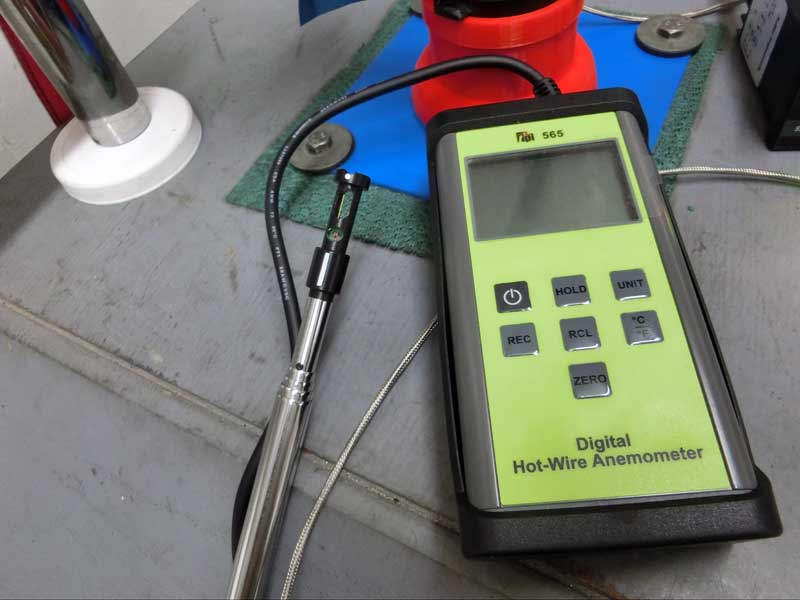
The test setup is very similar to the prior testing. Two hot air sources consisting of a heat gun and hair dryer are directed at the intercooler inlet through a metal pipe.
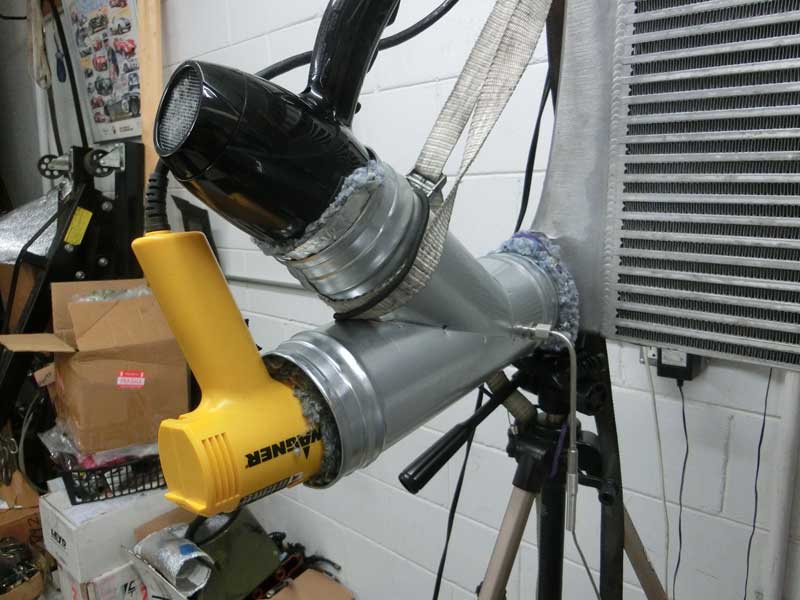
On the outlet side a temperature probe is placed in the airstream and the outlet then attaches to the flowbench. The flowbench is operated at a fixed airflow rate to have an equal quantity of air that passes through the interior of the intercooler on different test runs.
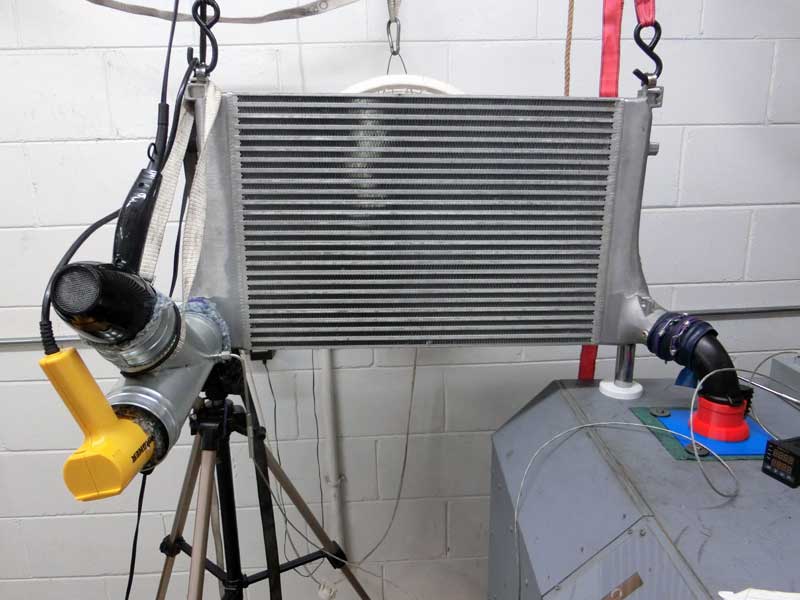
The intercooler is hung in open air, a much more favorable arrangement for heat transfer than is present in the GTI engine compartment. A fan is placed directly in front of the intercooler to supply cooling airflow.

Airflow velocity from the cooling fan is checked to gauge the difference in fan speed settings.
Test Conduct:
Trial 1 –
Finally testing begins. Hot air is drawn through the interior of the IC and the cooling fan is turned on after 30 seconds of heating. Nine (9) minutes into the test the outlet air temperature has only risen ten degrees and is very slowly continuing to creep upward. This is not efficiently getting near an answer.
The cooling fan is shut off for one minute and then is turned back on again. The temperature rises slightly faster but then starts to cool slightly.
Results: Unsatisfactory
Trial 2 –
The cooling fan is cycled on, indicated by the blue vertical lines, and then off, indicated by the red vertical lines every minute. The intercooler warms and then slows, then warms and slows, eventually beginning to warm and then cool.
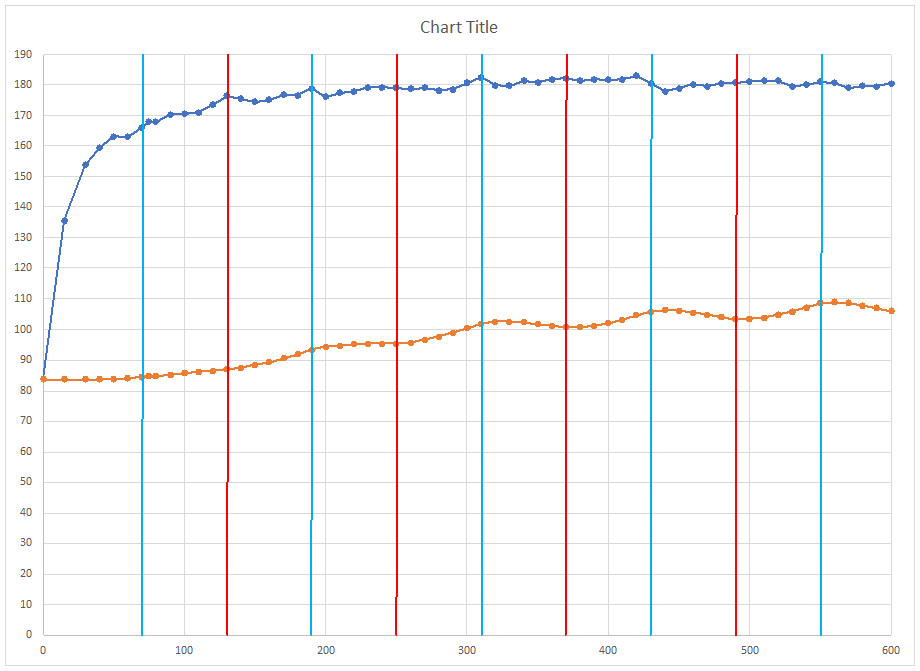
In a search for steady state outlet air temperature this method is not working well.
Results: Unsatisfactory
Trial 3 –
Next the intercooler is heated for 90 seconds and then the fan is turned on. After 30 seconds the fan is shut off then after 90 seconds the fan is turned back on. It is shut off and then turned back on one more time.
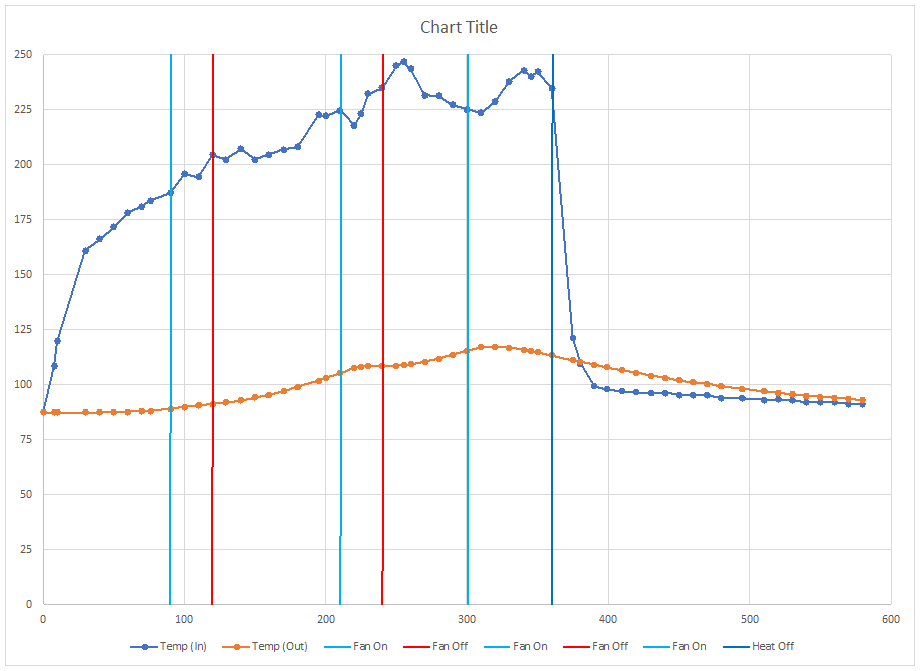
Again the results are not as hoped for with the IC heating as expected when the fan is off but then cooling quickly when the fan is turned back on.
Results: Unsatisfactory
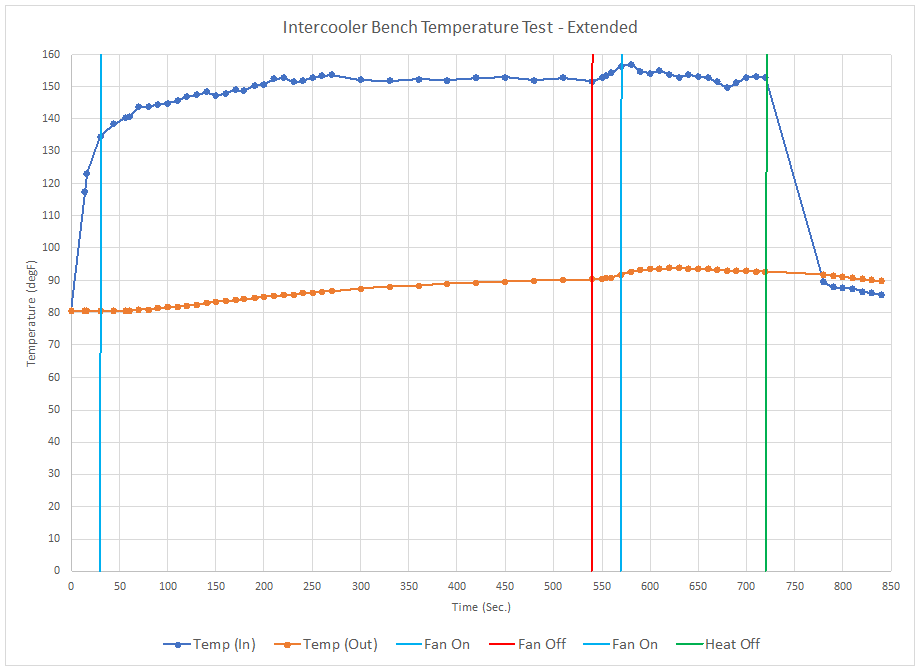
Trial 4 –
The heat source and cooling fan were now adjusted. The heat gun set to high, approximately 500F outlet temperature, and the fan to the lowest setting.
The intercooler was heated for one minute without the fan blowing, and then the fan is turned on and remains on.

This result was satisfactory. The outlet air temperature initially rises at a moderate rate and then slows as the equilibrium point is neared. The temperature continues to increase slowly after approximately seven minutes.
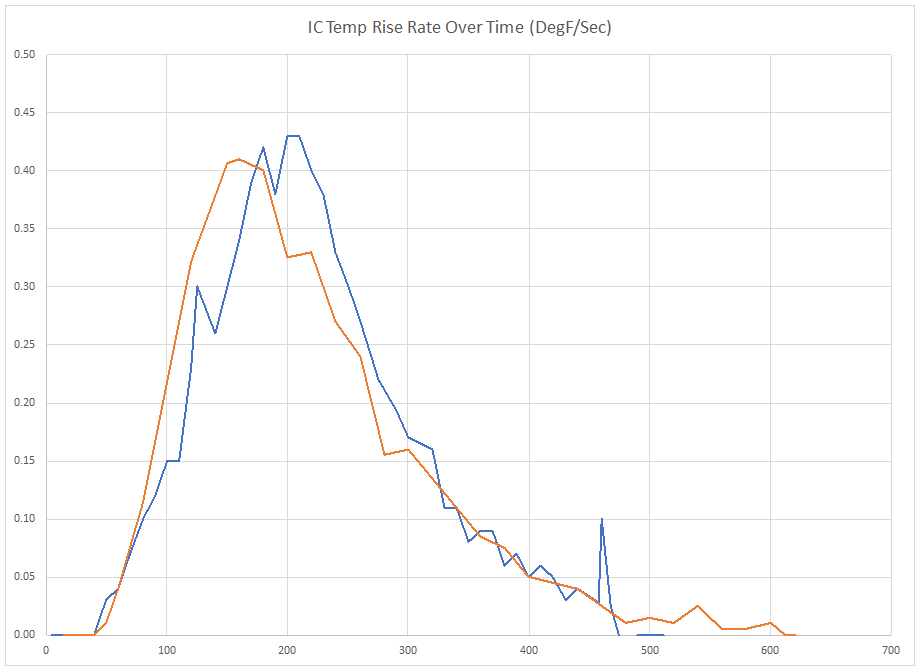
Post-test analysis of the temperature readings more clearly shows that around eight minutes into the test the rate of temperature increase of the outlet air is slowing to a near steady state condition.
Note: Once the curve approaches zero the data showed alternating periods of zero rise and a very small rise. My theory for this is that the metal end tanks continue to heat and not cool as easily as the core fins. This warming of the end tanks then slowly and continuously causes the air passing through the core to warm a small amount.
The method identified for the next round of bench cooling tests jump starts the heating process by flowing hot air through the intercooler for 60 seconds without any fan supplied cooling airflow. The fan is turned on after one minute and then run continuously while the core heats and the outlet temperature is recorded. When the rise in the outlet air temperature slows to the point that over a sampling interval of 20 seconds there is no change in the outlet air temperature the test run is stopped.
Test Measure:
Data of interest generated from this test will be the outlet air temperature at which steady state occurs, along with the time at which steady state occurs.
Cautions:
This revised test procedure benefits from the lessons learned during the first round of testing but there are still shortcomings to the procedure.
Verifying the inlet air temperature is difficult due to the very narrow stream of air exiting the heat gun. A temperature sensor is installed in the inlet pipe to check the temperature entering the intercooler, but alignment of the heat gun can cause large swings in the temperature reading from the sensor depending on which portion of the hot air stream passes over the temperature sensor.
The cooling fan is positioned in front of the core but precise alignment of the airflow with the core fins is not possible with this setup. Ideally the airflow would pass through the core at the same angle relative to the cooling fins and charge air rows for all intercoolers tested, but that is not possible to verify with this set up.
The airflow through the core generated by the flow bench is approximately the same for each test case, but it is not possibly to hold the airflow constant with two external air sources blowing air into the intercooler. The airflow rate cycles steadily by a couple of CFM during the testing.
These are some limitations of the test and need to be considered if very similar results are produced by different intercoolers. Large differences produced by different intercoolers should be valid for relative comparison purposes.
I’m leaning towards either the do88 or the mishimoto IC, my car is stage 2 and just a daily drive but I will be doing long hwy drive of 6hrs + with overtaking. what do you think would suit me best?
I don’t think there is going to be a detectable performance difference under those conditions. You can probable use some other criteria than performance to select one.
I’m really just looking for an intetcooler that is going to keep the air temps down and prevent heat soak. I’m not racing but do drive long hours and overtake alot.. with all your research what would you recommend?
I’ve summarized the performance of the products I have tested on this page. If you apply that information along with other criteria that you have that should get you in the right direction. As you’ll see from the data, everything that I have tested has been an improvement over the stock GTI IC.